Privy’s wallet system supports granular controls on who can access wallets and what actions different users can perform. To enforce these controls, Privy’s API must verify the identity of the party requesting a wallet action, ensuring that only authorized actions are executed by the system. This process is known as authentication. Privy supports both user authentication and API authentication for authenticating access to wallets.Documentation Index
Fetch the complete documentation index at: https://docs.privy.io/llms.txt
Use this file to discover all available pages before exploring further.
User authentication
Privy is a powerful toolkit for progressive authentication of users. With fine-grained control over onboarding flows and wallet connections, you can improve conversion and craft better UX. Your app can authenticate users across web2 and web3 accounts, using either your existing authentication provider or Privy’s authentication system.Using Privy as your authentication provider
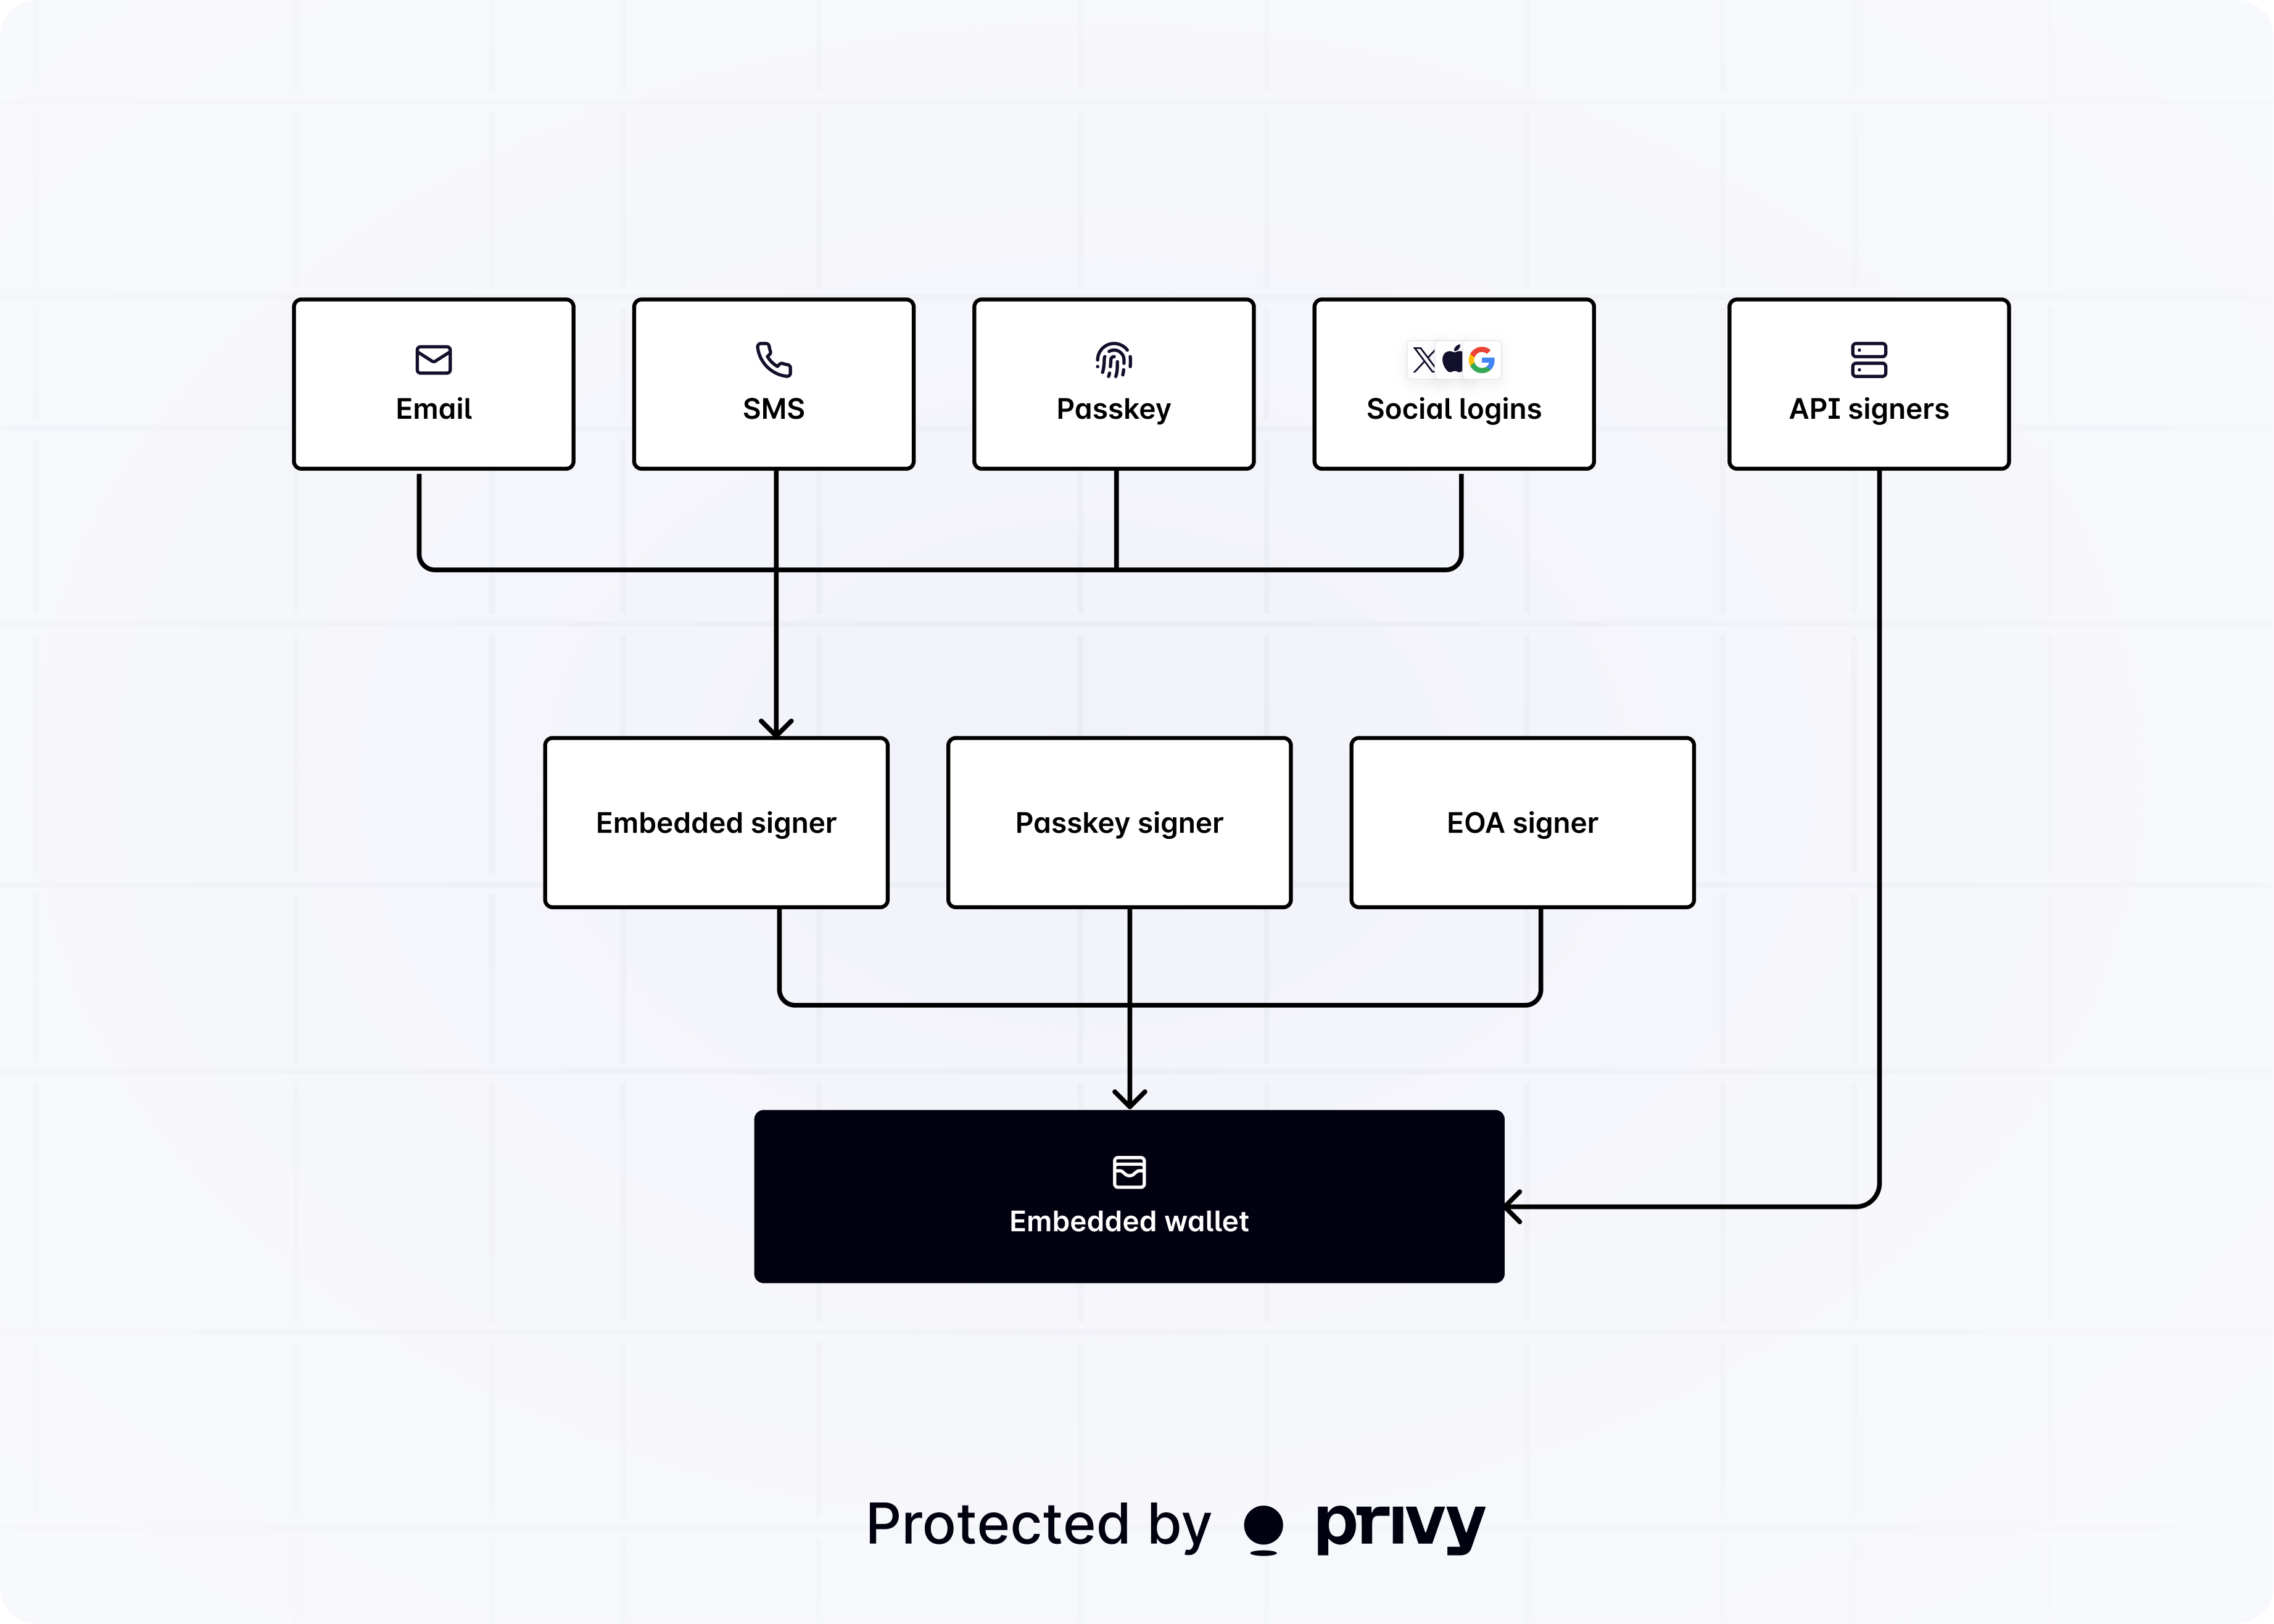
If your app doesn’t have an existing authentication provider, or would like a single provider for authentication and embedded wallets, you can use Privy’s authentication system, which supports both web2 and web3 accounts. Privy’s client-side SDKs offers a variety of authentication methods, including email, SMS, passkey, socials (Google, Apple, Twitter, Farcaster, etc.), any OAuth system, and Ethereum and Solana wallets. You can also associate multiple authentication methods with a user, allowing them to login to the same account and access the same wallet with whichever method they choose.Using your own authentication provider
If your app already has an authentication provider, Privy integrates with your app’s existing authentication system. This includes any OIDC compliant authentication system , including OAuth 2.0, Auth0, Firebase, AWS Cognito, and more. You can integrate your existing authentication provider with Privy via the REST API or any of Privy’s client-side SDKs.API authentication
With API authentication, Privy authenticates a request from your server directly using an API secret. This ensures that Privy only executes requests sent by your servers alone, and no other party. In addition to the API secret, you can also configure authorization keys that control specific wallets, policies, and other resources. Any requests to use or update these resources require a signature from the corresponding authorization key. This allows you to enforce granular controls on all Privy resources.Get started
Login users with their email
Authenticate users using just their email address and a one-time passcode.
Login with metamask
Authenticate users with their externally owned Ethereum or Solana wallets.
Enable MFA
Add an extra layer of security to user accounts with multi-factor authentication.
Seamless Farcaster Mini App login
Allow your users to sign into your Farcaster Mini App seamlessly with Privy.