> ## Documentation Index
> Fetch the complete documentation index at: https://docs.privy.io/llms.txt
> Use this file to discover all available pages before exploring further.
# Denylist
Privy allows your app to enable a **denylist** to block specific users from logging in to your app and creating accounts. You can use the denylist to block users who have previously been malicious in your application or who violate your terms of service.
Currently, Privy denylists support blocking users based on their **email address, phone number, EVM wallet address or Solana wallet address**. You can choose to either block a specific email address (e.g. `bruce@wayneenterprises.com`) or an email domain (e.g. `@wayneenterprises.com`).
Denylists apply to email, SMS, wallet, and OAuth methods with verified emails only. Login methods
like Telegram and Farcaster are not supported.
## Enabling the denylist for your app
You can enable an denylist directly from the [Privy developer dashboard](https://dashboard.privy.io). To do so, just navigate to the **Users** page > [Access Control](https://dashboard.privy.io/apps/cm7z7tdvm00oxpsqt25bha0tv/users?tab=access-control) tab of the dashboard and toggle denylists on.
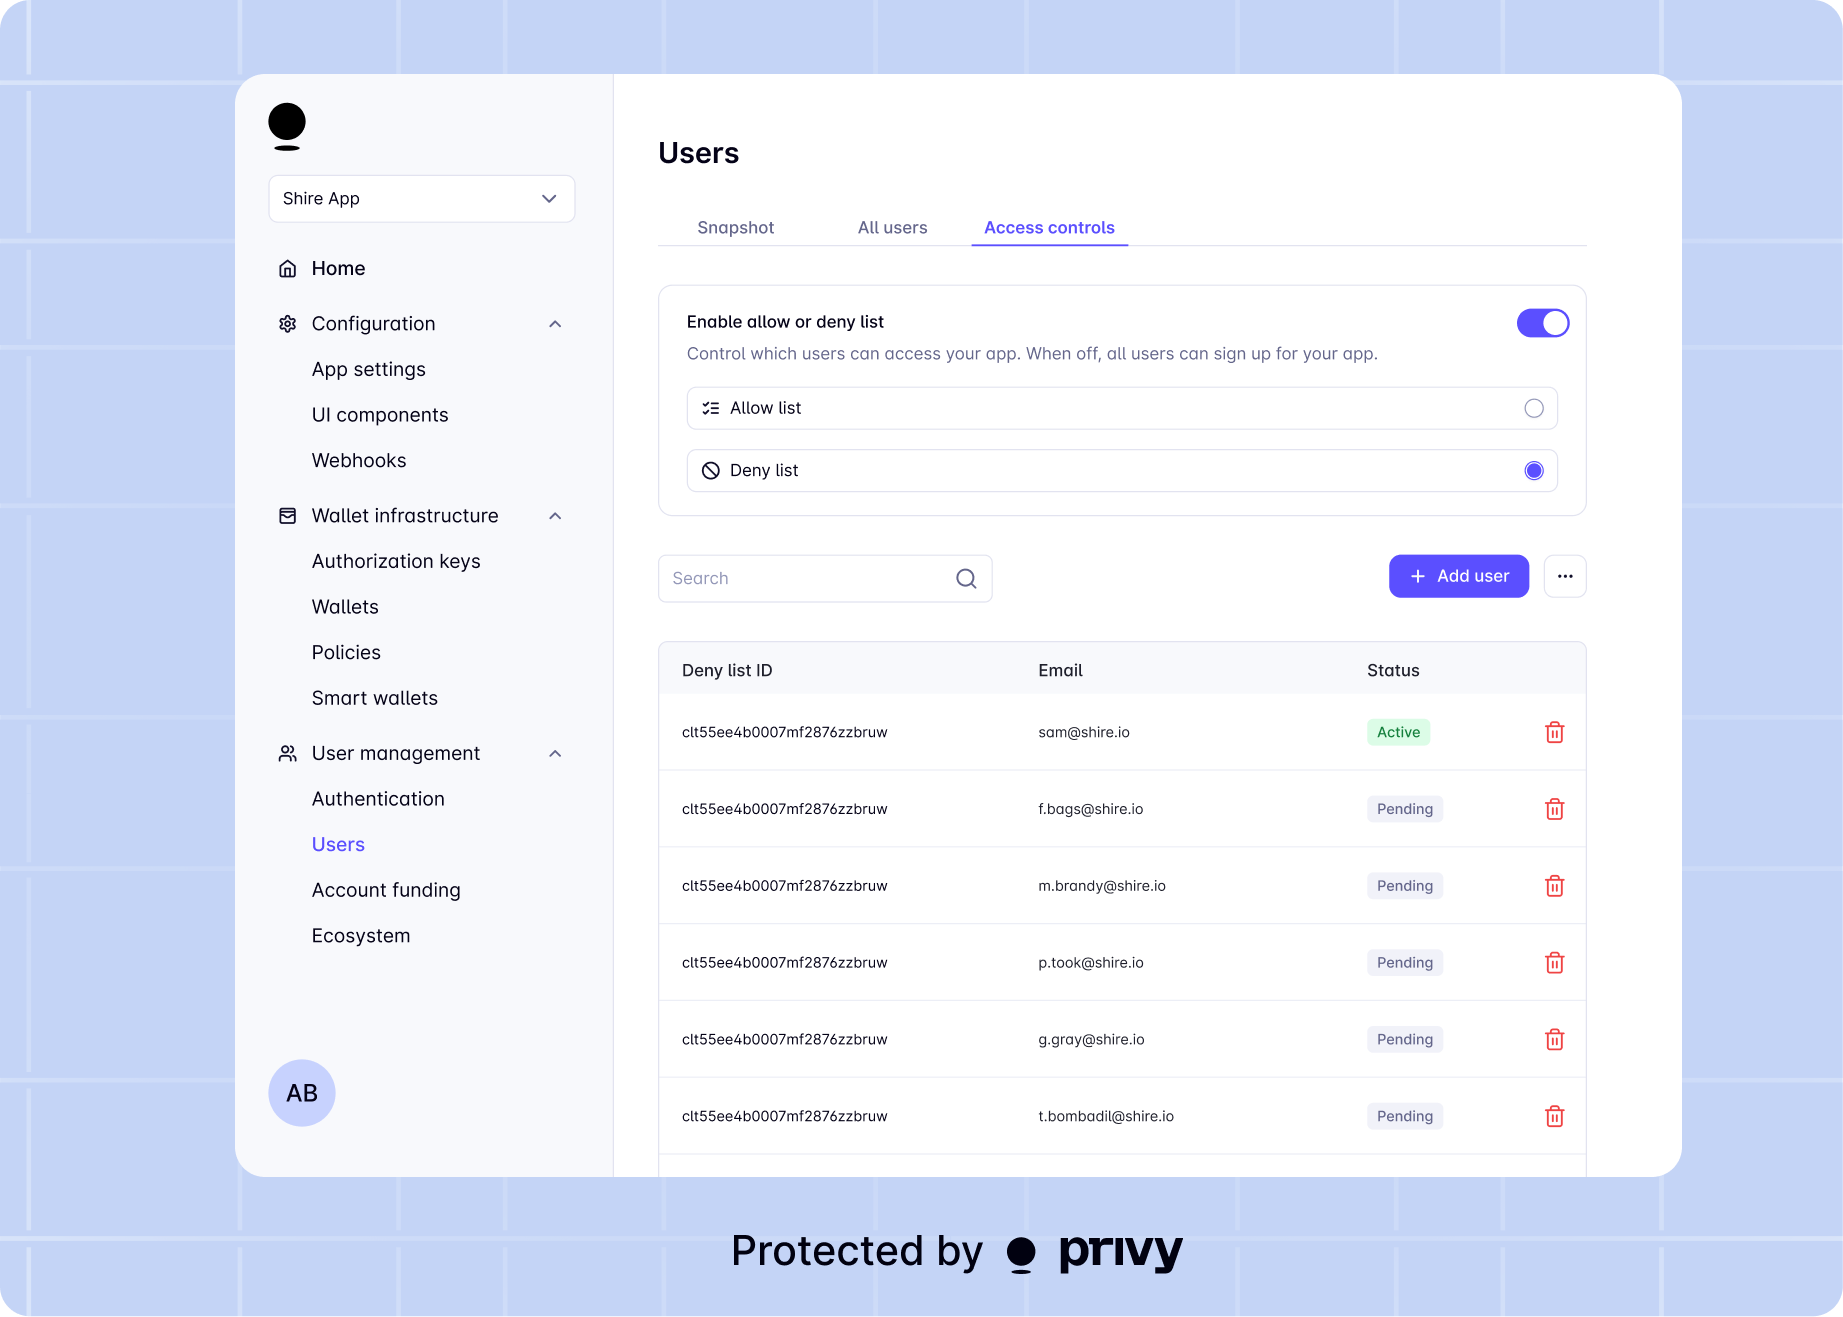 ## Managing the denylist
There are two main ways to manage the denylist for your app:
* Using the API, you can easily [add entries](/user-management/users/managing-users/denylist#adding-to-the-deny-list), [remove entries](/user-management/users/managing-users/denylist#removing-from-the-deny-list), and [get your current denylist](/user-management/users/managing-users/denylist#getting-the-deny-list).
* Using the developer dashboard, you can easily [add and remove entries](/user-management/users/managing-users/denylist#adding-to-the-deny-list) from your app's denylist.
## Adding to the denylist
If you do not have a denylist enabled for your app, this request will fail.
Privy allows you to easily add an individual email address, phone number, EVM wallet address or Solana wallet address to your denylist.
To add an entry to the denylist, make a `POST` request to:
```sh theme={"system"}
https://auth.privy.io/api/v1/apps//denylist
```
In the body of the request, include the following fields:
Specifies that the request adds an email address, email domain, phone number, EVM wallet address
or Solana wallet address to the denylist.
The email address, email domain, phone number, EVM wallet address or Solana wallet address to add
to the denylist.
Below is a sample cURL command for adding an email to the denylist:
```bash theme={"system"}
curl --request POST 'https://auth.privy.io/api/v1/apps//denylist' \
-u ":" \
-H "privy-app-id: " \
-H "Content-Type: application/json" \
--data-raw '{
"type": "email",
"value": "user@email.com"
}'
```
A successful response will include the new denylist entry, like below
```json theme={"system"}
{
"id": "denylist-entry-ID",
"rule_type": "email",
"value": "user@email.com"
}
```
***
# Removing from the denylist
If you do not have a denylist enabled for your app, this request will fail.
To delete an entry from the denylist, make a `DELETE` request to:
```sh theme={"system"}
https://auth.privy.io/api/v1/apps//denylist
```
In the body of the request, include the following fields:
The ID of the denylist entry to be removed. You can obtain this ID by [getting your current deny
list](/user-management/users/managing-users/denylist).
Below is a sample cURL command for deleting an email from the denylist:
```bash theme={"system"}
curl --request DELETE 'https://auth.privy.io/api/v1/apps//denylist' \
-u ":" \
-H "privy-app-id: " \
-H "Content-Type: application/json" \
--data-raw '{
"id": "clpa828s4001hl90f6dxoksrg",
}'
```
A successful request will return response code `204`. If there is no corresponding denylist entry, the response will include an error.
***
# Getting the denylist
To get your current denylist, make a `GET` request to:
```sh theme={"system"}
https://auth.privy.io/api/v1/apps//denylist
```
This is a paginated query, and the API will return up to 1000 denylist entries for a single request.
## Parameters
In the **request query parameters**, specify the following fields:
When you request a batch of denylist entries from Privy, the API will return a cursor for the *next* batch of denylist entries in the `next_cursor` field of the [response](#response). This will be a denylist ID, which is a `string`.
If you are requesting the *first* batch of denylist entries for your app, do not include a `cursor` in your request parameters.
If you have already requested a batch of denylist entries and want to request the next batch, set the `cursor` in your request parameters to be the `next_cursor` returned by the API in your previous query. If the provided `cursor` is not a valid denylist ID, the API will return an error.
The number of users you would like the API to return. Defaults to 1000.
As an example, to get the first 1000 denylist entries for your app, you should include *no* URL query parameters:
```sh theme={"system"}
curl --request GET https://auth.privy.io/api/v1/apps//denylist \
-u ":" \
-H "privy-app-id: "
```
Then, to get the *next* 1000 denylist entries for your app, you should pass the `next_cursor` field of the last response as the `cursor` in your request query parameters:
```sh theme={"system"}
# Replace below with the `next_cursor` returned by the last query
curl --request GET https://auth.privy.io/api/v1/apps//denylist?cursor= \
-u ":" \
-H "privy-app-id: "
```
## Response
A successful response will include:
The denylist entries as an array
The cursor to be used in your next request to this API
Below is an example:
```json theme={"system"}
{
"data": [
{
"id": "denylist-entry-ID1",
"rule_type": "email",
"value": "user@email.com"
},
{
"id": "denylist-entry-ID2",
"rule_type": "emailDomain",
"value": "email.com"
}
// ...
],
"next_cursor": "denylist-entry-ID2"
}
```
If you need to [remove an entry](/user-management/users/managing-users/denylist#removing-from-the-deny-list) from your denylist, you will need the `id` field returned in this API response.
## Managing the denylist
There are two main ways to manage the denylist for your app:
* Using the API, you can easily [add entries](/user-management/users/managing-users/denylist#adding-to-the-deny-list), [remove entries](/user-management/users/managing-users/denylist#removing-from-the-deny-list), and [get your current denylist](/user-management/users/managing-users/denylist#getting-the-deny-list).
* Using the developer dashboard, you can easily [add and remove entries](/user-management/users/managing-users/denylist#adding-to-the-deny-list) from your app's denylist.
## Adding to the denylist
If you do not have a denylist enabled for your app, this request will fail.
Privy allows you to easily add an individual email address, phone number, EVM wallet address or Solana wallet address to your denylist.
To add an entry to the denylist, make a `POST` request to:
```sh theme={"system"}
https://auth.privy.io/api/v1/apps//denylist
```
In the body of the request, include the following fields:
Specifies that the request adds an email address, email domain, phone number, EVM wallet address
or Solana wallet address to the denylist.
The email address, email domain, phone number, EVM wallet address or Solana wallet address to add
to the denylist.
Below is a sample cURL command for adding an email to the denylist:
```bash theme={"system"}
curl --request POST 'https://auth.privy.io/api/v1/apps//denylist' \
-u ":" \
-H "privy-app-id: " \
-H "Content-Type: application/json" \
--data-raw '{
"type": "email",
"value": "user@email.com"
}'
```
A successful response will include the new denylist entry, like below
```json theme={"system"}
{
"id": "denylist-entry-ID",
"rule_type": "email",
"value": "user@email.com"
}
```
***
# Removing from the denylist
If you do not have a denylist enabled for your app, this request will fail.
To delete an entry from the denylist, make a `DELETE` request to:
```sh theme={"system"}
https://auth.privy.io/api/v1/apps//denylist
```
In the body of the request, include the following fields:
The ID of the denylist entry to be removed. You can obtain this ID by [getting your current deny
list](/user-management/users/managing-users/denylist).
Below is a sample cURL command for deleting an email from the denylist:
```bash theme={"system"}
curl --request DELETE 'https://auth.privy.io/api/v1/apps//denylist' \
-u ":" \
-H "privy-app-id: " \
-H "Content-Type: application/json" \
--data-raw '{
"id": "clpa828s4001hl90f6dxoksrg",
}'
```
A successful request will return response code `204`. If there is no corresponding denylist entry, the response will include an error.
***
# Getting the denylist
To get your current denylist, make a `GET` request to:
```sh theme={"system"}
https://auth.privy.io/api/v1/apps//denylist
```
This is a paginated query, and the API will return up to 1000 denylist entries for a single request.
## Parameters
In the **request query parameters**, specify the following fields:
When you request a batch of denylist entries from Privy, the API will return a cursor for the *next* batch of denylist entries in the `next_cursor` field of the [response](#response). This will be a denylist ID, which is a `string`.
If you are requesting the *first* batch of denylist entries for your app, do not include a `cursor` in your request parameters.
If you have already requested a batch of denylist entries and want to request the next batch, set the `cursor` in your request parameters to be the `next_cursor` returned by the API in your previous query. If the provided `cursor` is not a valid denylist ID, the API will return an error.
The number of users you would like the API to return. Defaults to 1000.
As an example, to get the first 1000 denylist entries for your app, you should include *no* URL query parameters:
```sh theme={"system"}
curl --request GET https://auth.privy.io/api/v1/apps//denylist \
-u ":" \
-H "privy-app-id: "
```
Then, to get the *next* 1000 denylist entries for your app, you should pass the `next_cursor` field of the last response as the `cursor` in your request query parameters:
```sh theme={"system"}
# Replace below with the `next_cursor` returned by the last query
curl --request GET https://auth.privy.io/api/v1/apps//denylist?cursor= \
-u ":" \
-H "privy-app-id: "
```
## Response
A successful response will include:
The denylist entries as an array
The cursor to be used in your next request to this API
Below is an example:
```json theme={"system"}
{
"data": [
{
"id": "denylist-entry-ID1",
"rule_type": "email",
"value": "user@email.com"
},
{
"id": "denylist-entry-ID2",
"rule_type": "emailDomain",
"value": "email.com"
}
// ...
],
"next_cursor": "denylist-entry-ID2"
}
```
If you need to [remove an entry](/user-management/users/managing-users/denylist#removing-from-the-deny-list) from your denylist, you will need the `id` field returned in this API response.