> ## Documentation Index
> Fetch the complete documentation index at: https://docs.privy.io/llms.txt
> Use this file to discover all available pages before exploring further.
# Linking accounts to users
Developers can use Privy to prompt users to link additional accounts (such as a wallet or Discord profile) at *any point* in their user journey, not just during login.
This is key to Privy's **progressive onboarding**: improving conversion and UX by requiring users to complete onboarding steps (e.g. connecting an account) only when necessary.
**A user's Privy account and any associated embedded wallets become permanently inaccessible if
the user loses their only login method.** Social OAuth providers (Twitter, Discord, etc.) can
suspend or permanently delete accounts without notice — neither the app developer nor Privy can
re-link a new authentication method on a user's behalf.
Apps that hold onchain assets should prompt users to link at least one durable backup method
(email, phone number, or passkey) in addition to social login.
The React SDK supports linking all supported account types via our modal-guided link methods.
**To prompt a user to link an account, use the respective method from the **`useLinkAccount`** hook:**
| Method | Description | User Experience |
| ------------------- | --------------------------------------------------------- | ---------------- |
| `linkEmail` | Links email address | Opens modal |
| `linkPhone` | Links phone number | Opens modal |
| `linkWallet` | Links external wallet | Opens modal |
| `linkGoogle` | Links Google account | Direct redirect |
| `linkApple` | Links Apple account | Direct redirect |
| `linkTwitter` | Links Twitter account | Direct redirect |
| `linkDiscord` | Links Discord account | Direct redirect |
| `linkGithub` | Links Github account | Direct redirect |
| `linkLinkedIn` | Links LinkedIn account | Direct redirect |
| `linkTiktok` | Links TikTok account | Direct redirect |
| `linkSpotify` | Links Spotify account | Direct redirect |
| `linkInstagram` | Links Instagram account | Direct redirect |
| `linkTelegram` | Links Telegram account | Direct redirect |
| `linkFarcaster` | Links Farcaster account | Displays QR code |
| `linkPasskey` | Links passkey | Opens modal |
| `linkTwitch` | Links Twitch account | Direct redirect |
| `linkLine` | Links LINE account | Direct redirect |
| `linkOAuth` | Links additional OAuth account | Direct redirect |
| `linkWithCustomJwt` | Links a custom JWT account (via `useLinkJwtAccount` hook) | Headless |
Users are only permitted to link **a single account** for a given account type, except for wallets and passkeys. Concretely, a user may link at most one email address, but can link as many wallets and passkeys as they'd like.
Below is an example button for prompting a user to link an email to their account:
```tsx theme={"system"}
import {useLinkAccount} from '@privy-io/react-auth';
function LinkOptions() {
const {linkEmail, linkGoogle, linkWallet} = useLinkAccount();
return (
);
}
```
### Callbacks
You can optionally register an `onSuccess` or `onError` callback on the `useLinkAccount` hook.
```tsx theme={"system"}
const {linkGoogle} = useLinkAccount({
onSuccess: ({user, linkMethod, linkedAccount}) => {
console.log('Linked account to user ', linkedAccount);
},
onError: (error) => {
console.error('Failed to link account with error ', error)
}
})
```
Optional callback to run after a user successfully links an account.
Optional callback to run after there is an error during account linkage.
**Looking for whitelabel `link` methods?** Our [`useLoginWith`](/authentication/user-authentication/login-methods/email) hooks allow will link an account to a user, provided that the user is already logged in whenever the authentication flow is completed. For headless wallet linking with `useLinkWithSiwe` or `useLinkWithSiws`, see the [whitelabel user management documentation](/user-management/users/whitelabel#react).
### Linking additional OAuth accounts
The `linkOAuth` method allows your app to link [additional OAuth providers](/authentication/user-authentication/login-methods/custom-oauth) that are not natively supported by Privy. For built-in providers like Google or Twitter, use the dedicated methods (e.g., `linkGoogle`, `linkTwitter`).
```tsx theme={"system"}
import {useLinkAccount} from '@privy-io/react-auth';
function LinkOAuthButton() {
const {linkOAuth} = useLinkAccount();
return (
);
}
```
#### Parameters
The `linkOAuth` method accepts an object with the following fields:
The additional OAuth provider to link, in the format `'custom:'` (e.g., `'custom:twitch'`).
### Linking custom JWT accounts
If your app uses an [external JWT-based authentication provider](/authentication/user-authentication/jwt-based-auth/setup), use the `useLinkJwtAccount` hook to link a custom JWT account to an already-authenticated Privy user. Unlike the methods above, this hook is headless: you provide the JWT yourself and Privy verifies it on the server.
```tsx theme={"system"}
import {useLinkJwtAccount} from '@privy-io/react-auth';
function LinkJwtAccountButton() {
const {linkWithCustomJwt, state} = useLinkJwtAccount();
const handleLink = async () => {
const jwt = await getJwtFromExternalAuth();
await linkWithCustomJwt(jwt);
};
return (
);
}
```
#### Parameters
The JWT issued by your external authentication provider to link to the user's account.
#### State
The `state` property tracks the current state of the JWT linking flow:
| Status | Description |
| --------------- | ------------------------------------------- |
| `'initial'` | The flow has not started |
| `'loading'` | The JWT is being verified and linked |
| `'not-enabled'` | Custom JWT auth is not enabled for this app |
| `'done'` | The account was linked successfully |
| `'error'` | An error occurred |
#### Callbacks
You can optionally pass `onSuccess` and `onError` callbacks into `useLinkJwtAccount`:
```tsx theme={"system"}
const {linkWithCustomJwt, state} = useLinkJwtAccount({
onSuccess: ({user, linkMethod, linkedAccount}) => {
console.log('JWT account linked successfully', linkedAccount);
},
onError: (error) => {
console.error('Failed to link JWT account', error);
}
});
```
Custom JWT authentication must be enabled in your Privy Dashboard before using this hook. See the [JWT-based authentication setup docs](/authentication/user-authentication/jwt-based-auth/setup) for instructions.
**To prompt a user to link an account, use the respective hooks:**
| Account type | Description | Hook to invoke |
| ------------ | ----------------------- | -------------------------------------------------- |
| `Email` | Links email address | `useLinkEmail` |
| `Phone` | Links phone number | `useLinkSMS` |
| `Wallet` | Links external wallet | `useLinkWithSiwe`, `useLinkWithSiws` |
| `Google` | Links Google account | `useLinkWithOAuth` |
| `Apple` | Links Apple account | `useLinkWithOAuth` |
| `Twitter` | Links Twitter account | `useLinkWithOAuth` |
| `Discord` | Links Discord account | `useLinkWithOAuth` |
| `Github` | Links Github account | `useLinkWithOAuth` |
| `LinkedIn` | Links LinkedIn account | `useLinkWithOAuth` |
| `TikTok` | Links TikTok account | `useLinkWithOAuth` |
| `Spotify` | Links Spotify account | `useLinkWithOAuth` |
| `Instagram` | Links Instagram account | `useLinkWithOAuth` |
| `Farcaster` | Links Farcaster account | `useLinkWithFarcaster` |
| `Passkey` | Links passkey | `useLinkWithPasskey` from `@privy-io/expo/passkey` |
Users are only permitted to link **a single account** for a given account type, except for wallets and passkeys. Concretely, a user may link at most one email address, but can link as many wallets and passkeys as they'd like.
Use the `useLinkEmail` hook to link an email address to an existing user.
```tsx theme={"system"}
import {useLinkEmail} from '@privy-io/expo';
const {sendCode, linkWithCode, state} = useLinkEmail();
```
### Send code
```tsx theme={"system"}
sendCode({email: string}) => Promise<{success: boolean}>
```
The email address to send the verification code to.
### Link with code
```tsx theme={"system"}
linkWithCode({code: string, email?: string}) => Promise
```
The one-time passcode received at the email address.
Optional. The email address to link. If omitted, uses the email from `sendCode`.
### State
The `state` property tracks the current state of the OTP flow:
| Status | Description |
| ----------------------- | -------------------------------------- |
| `'initial'` | The flow has not started |
| `'sending-code'` | The code is being sent |
| `'awaiting-code-input'` | Waiting for the user to enter the code |
| `'submitting-code'` | The code is being verified |
| `'done'` | The email was linked successfully |
| `'error'` | An error occurred |
### Callbacks
```tsx theme={"system"}
const {sendCode, linkWithCode, state} = useLinkEmail({
onSendCodeSuccess: ({email}) => console.log('Code sent to', email),
onLinkSuccess: ({user}) => console.log('Email linked', user),
onError: (error) => console.error(error),
});
```
### Usage
```tsx theme={"system"}
import {useLinkEmail} from '@privy-io/expo';
function LinkEmailButton() {
const {sendCode, linkWithCode, state} = useLinkEmail({
onLinkSuccess: ({user}) => console.log('Email linked!', user),
onError: (error) => console.error('Link failed:', error),
});
const handleSendCode = async () => {
await sendCode({email: 'user@example.com'});
};
const handleVerify = async (code: string) => {
await linkWithCode({code});
};
return (
handleVerify(e.nativeEvent.text)} />
);
}
```
Use the `useLinkSMS` hook to link a phone number to an existing user.
```tsx theme={"system"}
import {useLinkSMS} from '@privy-io/expo';
const {sendCode, linkWithCode, state} = useLinkSMS();
```
### Send code
```tsx theme={"system"}
sendCode({phone: string}) => Promise<{success: boolean}>
```
The phone number to send the verification code to (e.g., `'+1234567890'`).
### Link with code
```tsx theme={"system"}
linkWithCode({code: string, phone?: string}) => Promise
```
The one-time passcode received at the phone number.
Optional. The phone number to link. If omitted, uses the phone from `sendCode`.
### State
The `state` property tracks the current state of the OTP flow (same states as email).
### Callbacks
```tsx theme={"system"}
const {sendCode, linkWithCode, state} = useLinkSMS({
onSendCodeSuccess: ({phone}) => console.log('Code sent to', phone),
onLinkSuccess: ({user}) => console.log('Phone linked', user),
onError: (error) => console.error(error),
});
```
### Usage
```tsx theme={"system"}
import {useLinkSMS} from '@privy-io/expo';
function LinkPhoneButton() {
const {sendCode, linkWithCode, state} = useLinkSMS({
onLinkSuccess: ({user}) => console.log('Phone linked!', user),
onError: (error) => console.error('Link failed:', error),
});
const handleSendCode = async () => {
await sendCode({phone: '+1234567890'});
};
const handleVerify = async (code: string) => {
await linkWithCode({code});
};
return (
handleVerify(e.nativeEvent.text)} />
);
}
```
Use the `useLinkWithOAuth` hook to link social accounts (Google, Apple, Twitter, Discord, etc.) to an existing user.
```tsx theme={"system"}
import {useLinkWithOAuth} from '@privy-io/expo';
const {link, state} = useLinkWithOAuth();
```
### Link
```tsx theme={"system"}
link({provider: OAuthProviderID, redirectUri?: string}) => Promise
```
The OAuth provider to link. Supported values: `'google'`, `'apple'`, `'twitter'`, `'discord'`, `'github'`, `'linkedin'`, `'tiktok'`, `'spotify'`, `'instagram'`.
Optional. A URL path that the provider will redirect to after authentication.
### State
The `state` property tracks the current state of the OAuth flow:
| Status | Description |
| ----------- | ----------------------------------- |
| `'initial'` | The flow has not started |
| `'loading'` | The OAuth flow is in progress |
| `'done'` | The account was linked successfully |
| `'error'` | An error occurred |
### Usage
```tsx theme={"system"}
import {useLinkWithOAuth} from '@privy-io/expo';
function LinkSocialButtons() {
const {link, state} = useLinkWithOAuth();
return (
);
}
```
Use the `useLinkWithFarcaster` hook to link a Farcaster account to an existing user.
```tsx theme={"system"}
import {useLinkWithFarcaster} from '@privy-io/expo';
const {linkWithFarcaster, cancel, state} = useLinkWithFarcaster();
```
### Link with Farcaster
```tsx theme={"system"}
linkWithFarcaster(input?: {relyingParty?: string, redirectUrl?: string}) => Promise
```
Optional. The relying party for the Farcaster authentication.
Optional. The URL to redirect to after authentication.
### Cancel
```tsx theme={"system"}
cancel() => void
```
Cancels an in-progress Farcaster linking flow.
### State
The `state` property tracks the current state of the Farcaster flow:
| Status | Description |
| ------------------ | ------------------------------------- |
| `'initial'` | The flow has not started |
| `'loading'` | The flow is in progress |
| `'awaiting-nonce'` | Waiting for nonce generation |
| `'polling'` | Polling for authentication completion |
| `'done'` | The account was linked successfully |
| `'error'` | An error occurred |
### Callbacks
```tsx theme={"system"}
const {linkWithFarcaster, cancel, state} = useLinkWithFarcaster({
onSuccess: ({user, linkedAccount}) => console.log('Farcaster linked', linkedAccount),
onError: (error) => console.error(error),
});
```
### Usage
```tsx theme={"system"}
import {useLinkWithFarcaster} from '@privy-io/expo';
function LinkFarcasterButton() {
const {linkWithFarcaster, cancel, state} = useLinkWithFarcaster({
onSuccess: ({user}) => console.log('Farcaster linked!', user),
onError: (error) => console.error('Link failed:', error),
});
if (state.status === 'polling') {
return (
Complete authentication in Warpcast...
);
}
return (
Use the `useLinkWithSiwe` hook to link an Ethereum wallet to an existing user via Sign-In with Ethereum.
```tsx theme={"system"}
import {useLinkWithSiwe} from '@privy-io/expo';
const {generateSiweMessage, linkWithSiwe, state} = useLinkWithSiwe();
```
### Generate SIWE message
```tsx theme={"system"}
generateSiweMessage({
wallet: ExternalWallet,
from: {domain: string, uri: string}
}) => Promise
```
The external wallet object to generate the message for.
Your app's domain (e.g., `'myapp.com'`).
Your app's URI (e.g., `'https://myapp.com'`).
### Link with SIWE
```tsx theme={"system"}
linkWithSiwe({
signature: string,
messageOverride?: string
}) => Promise
```
The signature from the wallet signing the SIWE message.
Optional. Override the message if different from the generated one.
### State
The `state` property tracks the current state of the SIWE flow:
| Status | Description |
| ------------------------ | ---------------------------------- |
| `'initial'` | The flow has not started |
| `'generating-message'` | Generating the SIWE message |
| `'awaiting-signature'` | Waiting for wallet signature |
| `'submitting-signature'` | Submitting the signature |
| `'done'` | The wallet was linked successfully |
| `'error'` | An error occurred |
### Callbacks
```tsx theme={"system"}
const {generateSiweMessage, linkWithSiwe, state} = useLinkWithSiwe({
onSuccess: ({user, linkedAccount}) => console.log('Wallet linked', linkedAccount),
onError: (error) => console.error(error),
onGenerateMessage: () => console.log('Generating message...'),
});
```
### Usage
```tsx theme={"system"}
import {useLinkWithSiwe} from '@privy-io/expo';
function LinkWalletButton({wallet}) {
const {generateSiweMessage, linkWithSiwe, state} = useLinkWithSiwe({
onSuccess: ({user}) => console.log('Wallet linked!', user),
onError: (error) => console.error('Link failed:', error),
});
const handleLink = async () => {
const message = await generateSiweMessage({
wallet,
from: {domain: 'myapp.com', uri: 'https://myapp.com'},
});
const signature = await wallet.sign(message);
await linkWithSiwe({signature});
};
return (
);
}
```
Use the `useLinkWithSiws` hook to link a Solana wallet to an existing user via Sign-In with Solana.
```tsx theme={"system"}
import {useLinkWithSiws} from '@privy-io/expo';
const {generateMessage, link} = useLinkWithSiws();
```
### Generate SIWS message
```tsx theme={"system"}
generateMessage({
wallet: {address: string},
from: {domain: string, uri: string}
}) => Promise<{message: string}>
```
The Solana wallet address.
Your app's domain (e.g., `'myapp.com'`).
Your app's URI (e.g., `'https://myapp.com'`).
### Link
```tsx theme={"system"}
link({
signature: string,
message: string,
wallet?: {walletClientType?: string, connectorType?: string}
}) => Promise
```
The signature from the wallet signing the SIWS message.
The SIWS message that was signed.
Optional. The wallet client type (e.g., `'phantom'`).
Optional. The connector type used.
### Usage
```tsx theme={"system"}
import {useLinkWithSiws} from '@privy-io/expo';
function LinkSolanaWalletButton({wallet}) {
const {generateMessage, link} = useLinkWithSiws();
const handleLink = async () => {
const {message} = await generateMessage({
wallet: {address: wallet.address},
from: {domain: 'myapp.com', uri: 'https://myapp.com'},
});
const signature = await wallet.signMessage(message);
await link({
signature,
message,
wallet: {walletClientType: 'phantom'},
});
};
return ;
}
```
Use the `useLinkWithPasskey` hook from `@privy-io/expo/passkey` to link a passkey to an existing user.
```tsx theme={"system"}
import {useLinkWithPasskey} from '@privy-io/expo/passkey';
const {linkWithPasskey, state} = useLinkWithPasskey();
```
### Link with passkey
```tsx theme={"system"}
linkWithPasskey({relyingParty: string}) => Promise
```
The relying party identifier for the passkey (typically your app's domain).
### State
The `state` property tracks the current state of the passkey flow:
| Status | Description |
| ------------------------ | ----------------------------------- |
| `'initial'` | The flow has not started |
| `'generating-challenge'` | Generating the passkey challenge |
| `'awaiting-passkey'` | Waiting for passkey creation |
| `'submitting-response'` | Submitting the passkey response |
| `'done'` | The passkey was linked successfully |
| `'error'` | An error occurred |
### Callbacks
```tsx theme={"system"}
const {linkWithPasskey, state} = useLinkWithPasskey({
onSuccess: ({user, linkedAccount}) => console.log('Passkey linked', linkedAccount),
onError: (error) => console.error(error),
});
```
### Usage
```tsx theme={"system"}
import {useLinkWithPasskey} from '@privy-io/expo/passkey';
function LinkPasskeyButton() {
const {linkWithPasskey, state} = useLinkWithPasskey({
onSuccess: ({user}) => console.log('Passkey linked!', user),
onError: (error) => console.error('Link failed:', error),
});
return (
Use the `useLinkWithCrossApp` hook to link a cross-app account (global wallet) to an existing user.
```tsx theme={"system"}
import {useLinkWithCrossApp} from '@privy-io/expo';
const {linkWithCrossApp} = useLinkWithCrossApp();
```
### Link with cross-app
```tsx theme={"system"}
linkWithCrossApp({appId: string, redirectUri?: string}) => Promise<{user: User}>
```
The Privy app ID of the provider app from which to link the account.
Optional. A URL path to redirect to after authentication.
### Usage
```tsx theme={"system"}
import {useLinkWithCrossApp} from '@privy-io/expo';
function LinkCrossAppButton() {
const {linkWithCrossApp} = useLinkWithCrossApp();
const handleLink = async () => {
const {user} = await linkWithCrossApp({
appId: 'provider-app-id',
});
console.log('Cross-app account linked!', user);
};
return ;
}
```
The steps to implementing the `linkWithCode` flow are analogous to the [`loginWithCode` flow](/authentication/user-authentication/login-methods/email). The same thing applies for the `PhoneAccount` type, using `privy.sms.linkWithCode` similar to how [`privy.sms.loginWithCode`](/authentication/user-authentication/login-methods/sms) works.
First, prompt the user for their email address and use the Privy client's `privy.email.sendCode` method to send them a one-time passcode:
```kotlin theme={"system"}
sendCode(email: String): Result
```
### Link With Code
Then, prompt the user for the code they received and use the `linkWithCode` method:
```kotlin theme={"system"}
linkWithCode(code: String, email: String? = null): Result
```
The one-time passcode sent to the user's email address.
(Optional) The user's email address. Though this parameter is optional, it is highly recommended that you pass the user's email address explicitly. If email is omitted, the email from `sendCode` will be used.
### Returns
A result type encapsulating the PrivyUser on success.
## Usage
```kotlin theme={"system"}
// Send code to user's email
val sendResult: Result = privy.email.sendCode(email = "user@test.com")
sendResult.fold(
onSuccess = {
// OTP was successfully sent, now prompt user for code
},
onFailure = {
println("Error sending OTP: ${it.message}")
}
)
// Link the email using the code
val linkResult: Result = privy.email.linkWithCode(code = "123456", email = "user@test.com")
linkResult.fold(
onSuccess = { updatedUser ->
println("Email successfully linked!")
// updatedUser contains the updated user object with the email added
},
onFailure = {
println("Error linking email: ${it.message}")
}
)
```
The steps to implementing the `link` flow are analogous to the [login flow's](/authentication/user-authentication/login-methods/wallet#android) of both Sign in with Ethereum (SIWE) and Sign in with Solana (SIWS).
To link an Ethereum wallet, use the Privy client's `siwe` handler.
## Generate SIWE message
```kotlin theme={"system"}
public suspend fun generateMessage(params: SiweMessageParams): Result
```
### Parameters
Set of parameters required to generate the message.
Your app's domain. e.g. "my-domain.com"
Your app's URI. e.g. "[https://my-domain.com](https://my-domain.com)"
EVM Chain ID, e.g. "1" for Ethereum Mainnet
The user's [ERC-55](https://eips.ethereum.org/EIPS/eip-55) compliant wallet address.
### Returns
A result type encapsulating the SIWE message that can be signed by the wallet on success.
### Usage
```kotlin theme={"system"}
val params = SiweMessageParams(
appDomain = domain,
appUri = uri,
chainId = chainId,
walletAddress = walletAddress
)
privy.siwe.generateSiweMessage(params = params).fold(
onSuccess = { message ->
// request an EIP-191 `personal_sign` signature on the message
},
onFailure = { e ->
// An error can be thrown if the network call to generate the message fails,
// or if invalid metadata was passed in.
}
)
```
## Sign the SIWE message
Using the message returned by `generateMessage`, request an EIP-191 `personal_sign` signature from the user's connected wallet. You should do this using the library your app uses to connect to external wallets (e.g. the MetaMask SDK or WalletConnect). Once the user successfully signs the message, pass the signature into the `link` function.
## Link with SIWE
```kotlin theme={"system"}
public suspend fun link(
message: String,
signature: String,
params: SiweMessageParams,
metadata: WalletLoginMetadata?,
): Result
```
### Parameters
The message returned from "generateMessage".
The signature of the SIWE message, signed by the user's wallet.
The same SiweMessageParams passed into "generateMessage".
(Optional) you can pass additional metadata that will be stored with the linked wallet.
An enum specifying the type of wallet used to link. e.g. WalletClientType.Metamask
A string identifying how wallet was connected. e.g. "wallet\_connect"
### Returns
A result type encapsulating the PrivyUser on success.
### Usage
```kotlin theme={"system"}
val params = SiweMessageParams(
appDomain = domain,
appUri = uri,
chainId = chainId,
walletAddress = walletAddress
)
// optional metadata
val metadata = WalletLoginMetadata(walletClientType = walletClient, connectorType = connectorType)
privy.siwe.link(message, signature, params, metadata).fold(
onSuccess = { updatedUser ->
// Link success
// updatedUser contains the updated user object with the wallet added
},
onFailure = { e ->
// Link failure, either due to invalid signature or network error
}
)
```
To link a Solana wallet, use the Privy client's `siws` handler.
## Generate SIWS message
```kotlin theme={"system"}
public suspend fun generateMessage(params: SiwsMessageParams): Result
```
### Parameters
Set of parameters required to generate the message.
Your app's domain. e.g. "my-domain.com"
Your app's URI. e.g. "[https://my-domain.com](https://my-domain.com)"
The user's Solana wallet address.
### Returns
A result type encapsulating the SIWS message that can be signed by the wallet on success.
### Usage
```kotlin theme={"system"}
val params = SiwsMessageParams(
appDomain = domain,
appUri = uri,
walletAddress = walletAddress
)
privy.siws.generateMessage(params = params).fold(
onSuccess = { message ->
// request a Solana wallet signature on the message
},
onFailure = { e ->
// An error can be thrown if the network call to generate the message fails,
// or if invalid metadata was passed in.
}
)
```
## Sign the SIWS message
Using the message returned by `generateMessage`, request a signature from the user's connected Solana wallet. You should do this using the library your app uses to connect to external wallets (e.g. the Solana Mobile SDK or Phantom). Once the user successfully signs the message, pass the signature into the `link` function.
## Link with SIWS
```kotlin theme={"system"}
public suspend fun link(
message: String,
signature: String,
params: SiwsMessageParams,
metadata: WalletLoginMetadata?,
): Result
```
### Parameters
The message returned from "generateMessage".
The signature of the SIWS message, signed by the user's wallet.
The same SiwsMessageParams passed into "generateMessage".
(Optional) you can pass additional metadata that will be stored with the linked wallet.
The client of the connected wallet (e.g. "phantom").
A string identifying how wallet was connected (e.g. "wallet\_connect" or "mobile\_wallet\_protocol").
### Returns
A result type encapsulating the PrivyUser on success.
### Usage
```kotlin theme={"system"}
val params = SiwsMessageParams(
appDomain = domain,
appUri = uri,
walletAddress = walletAddress
)
// optional metadata
val metadata = WalletLoginMetadata(
walletClientType = walletClient,
connectorType = connectorType
)
privy.siws.link(message, signature, params, metadata).fold(
onSuccess = { updatedUser ->
// Link success
// updatedUser contains the updated user object with the wallet added
},
onFailure = { e ->
// Link failure, either due to invalid signature or network error
}
)
```
Use the following method from the `passkey` handler to link a new passkey to a user. Be sure to follow Android passkey setup instructions [here](/authentication/user-authentication/login-methods/passkey#android).
```kotlin theme={"system"}
suspend fun link(
relyingParty: String,
displayName: String? = null
): Result
```
### Parameters
The URL origin where your Digital Asset Links are available (e.g., `https://example.com`).
An optional display name to associate with the passkey. This name will be shown to the user when selecting which passkey to use for authentication.
### Returns
A result type encapsulating the PrivyUser on success.
## Usage
```kotlin theme={"system"}
val relyingParty = "https://yourdomain.com"
val displayName = "Optional Display Name" // Optional parameter
privy.passkey.link(
relyingParty = relyingParty,
displayName = displayName
).fold(
onSuccess = { updatedUser ->
// Successfully linked a passkey to an existing user
// updatedUser contains the updated user object with the passkey added
println("Passkey linked successfully!")
},
onFailure = { error ->
// Handle error
println("Link failed: ${error.message}")
}
)
```
Use the following method from the OAuth handler to link a new OAuth account to an existing user:
```kotlin theme={"system"}
suspend fun link(oAuthProvider: OAuthProvider, appUrlScheme: String): Result
```
### Returns
A Result containing the updated user object with the newly linked OAuth account on success, or an exception on failure.
## Usage
```kotlin theme={"system"}
val scheme = "your-app-scheme://"
privy.oAuth
.link(OAuthProvider.Google, scheme)
.fold(
onSuccess = { user ->
// Successfully linked an OAuth account to an existing user
},
onFailure = { error ->
println("Linking failed: ${error.message}")
}
)
```
The steps to implementing the `linkWithCode` flow are analogous to the [`loginWithCode` flow](/authentication/user-authentication/login-methods/email).
The same thing applies for the `PhoneNumberAccount` type, using `privy.sms.linkWithCode` similar to how [`privy.sms.loginWithCode`](/authentication/user-authentication/login-methods/sms) works.
First, prompt the user for their email address and use the Privy client's `privy.email.sendCode` method to send them a one-time passcode:
```swift theme={"system"}
sendCode(to email: String) async throws
```
### Link With Code
Then, prompt the user for the code they received and use the `linkWithCode` method:
```swift theme={"system"}
linkWithCode(_ code: String, sentTo email: String) async throws -> PrivyUser
```
The one-time passcode sent to the user's email address.
The user's email address.
### Returns
The updated user object with the newly linked account.
### Throws
An error if linking the account is unsuccessful.
## Usage
```swift theme={"system"}
// Send code to user's email
do {
try await privy.email.sendCode(to: email)
// successfully sent code to users email
} catch {
print("error sending code to \(email): \(error)")
}
// Link the email using the code
do {
let user = try await privy.email.linkWithCode(code, sentTo: email)
print("Email successfully linked!")
// user has linked their email and user object is updated
} catch {
print("error linking email: \(error)")
}
```
The steps to implementing the `link` flow are analogous to the [login flow's](/authentication/user-authentication/login-methods/wallet#swift) of both Sign in with Ethereum (SIWE) and Sign in with Solana (SIWS).
To link an Ethereum wallet, use the Privy client's `siwe` handler.
## Generate SIWE message
```swift theme={"system"}
func generateMessage(params: SiweMessageParams) async throws -> String
```
### Parameters
Set of parameters required to generate the message.
Your app's domain.
Your app's URI.
EVM Chain ID, e.g. "1" for Ethereum Mainnet.
The user's [ERC-55](https://eips.ethereum.org/EIPS/eip-55) compliant wallet address.
### Returns
The SIWE message that can be signed by the wallet.
### Usage
```swift theme={"system"}
let params = SiweMessageParams(
appDomain: appDomain,
appUri: appUri,
chainId: chainId,
walletAddress: walletAddress
)
do {
let message = try await privy.siwe.generateMessage(params: params)
// request an EIP-191 `personal_sign` signature on the message
} catch {
// An error can be thrown if the network call to generate the message fails,
// or if invalid metadata was passed in.
}
```
## Sign the SIWE message
Using the message returned by `generateMessage`, request an EIP-191 `personal_sign` signature from the user's connected wallet. You should do this using the library your app uses to connect to external wallets (e.g. the MetaMask SDK or WalletConnect). Once the user successfully signs the message, pass the signature into the `link` function.
## Link with SIWE
```swift theme={"system"}
func link(
message: String,
signature: String,
params: SiweMessageParams,
metadata: WalletLoginMetadata?
) async throws -> PrivyUser
```
### Parameters
The message returned from `generateMessage`.
The signature of the SIWE message, signed by the user's wallet.
The same SiweMessageParams passed into `generateMessage`.
(Optional) Additional metadata that will be stored with the linked wallet.
An enum specifying the type of wallet used to link. e.g. `.metamask`
A string identifying how wallet was connected. e.g. "wallet\_connect"
### Returns
The updated user object with the wallet added.
### Usage
```swift theme={"system"}
let params = SiweMessageParams(
appDomain: appDomain,
appUri: appUri,
chainId: chainId,
walletAddress: walletAddress
)
// optional metadata
let metadata = WalletLoginMetadata(
walletClientType: walletClientType,
connectorType: connectorType
)
do {
let updatedUser = try await privy.siwe.link(
message: message,
signature: signature,
params: params,
metadata: metadata
)
// Link success
// updatedUser contains the updated user object with the wallet added
} catch {
// Link failure, either due to invalid signature or network error
}
```
To link a Solana wallet, use the Privy client's `siws` handler.
## Generate SIWS message
```swift theme={"system"}
func generateMessage(params: SiwsMessageParams) async throws -> String
```
### Parameters
Set of parameters required to generate the message.
Your app's domain.
Your app's URI.
The user's Solana wallet address.
### Returns
The SIWS message that can be signed by the wallet.
### Usage
```swift theme={"system"}
let params = SiwsMessageParams(
appDomain: appDomain,
appUri: appUri,
walletAddress: walletAddress
)
do {
let message = try await privy.siws.generateMessage(params: params)
// request a signature on the message from the Solana wallet
} catch {
// An error can be thrown if the network call to generate the message fails,
// or if invalid metadata was passed in.
}
```
## Sign the SIWS message
Using the message returned by `generateMessage`, request a signature from the user's connected Solana wallet. You should do this using the library your app uses to connect to Solana wallets (e.g. the Phantom SDK or Solana Mobile Wallet Adapter). Once the user successfully signs the message, pass the signature into the `link` function.
## Link with SIWS
```swift theme={"system"}
func link(
message: String,
signature: String,
metadata: WalletLoginMetadata?
) async throws -> PrivyUser
```
### Parameters
The message returned from `generateMessage`.
The signature of the SIWS message, signed by the user's Solana wallet.
(Optional) Additional metadata that will be stored with the linked wallet.
An enum specifying the type of wallet used to link.
A string identifying how wallet was connected.
### Returns
The updated user object with the wallet added.
### Usage
```swift theme={"system"}
let params = SiwsMessageParams(
appDomain: appDomain,
appUri: appUri,
walletAddress: walletAddress
)
// optional metadata
let metadata = WalletLoginMetadata(
walletClientType: walletClientType,
connectorType: connectorType
)
do {
let updatedUser = try await privy.siws.link(
message: message,
signature: signature,
metadata: metadata
)
// Link success
// updatedUser contains the updated user object with the wallet added
} catch {
// Link failure, either due to invalid signature or network error
}
```
Use the following method from the `passkey` handler to link a new passkey to a user. Be sure to follow iOS passkey setup instructions [here](/authentication/user-authentication/login-methods/passkey#swift).
```swift theme={"system"}
func link(relyingParty: String, displayName: String?) async throws -> PrivyUser
```
### Returns
The updated user object with the newly linked passkey.
## Usage
```swift theme={"system"}
do {
let displayName = "Optional Display Name"
let user = try await privy.passkey.link(
relyingParty: relyingParty,
displayName: displayName
)
// Successfully linked a passkey to an existing user
} catch {
print("Signup failed: \(error.localizedDescription)")
}
```
Use the following method from the OAuth handler to link a new OAuth account to an existing user.
```swift theme={"system"}
func link(with provider: OAuthProvider, appUrlScheme: String?) async throws -> PrivyUser
```
### Returns
The updated user object with the newly linked OAuth account.
## Usage
```swift theme={"system"}
do {
let user = try await privy.oAuth.link(
with: .google,
appUrlScheme: "your-app-scheme" // Optional
)
// Successfully linked an OAuth account to an existing user
} catch {
print("Linking failed: \(error.localizedDescription)")
}
```
The steps to implementing the `linkWithCode` flow are analogous to the [`loginWithCode` flow](/authentication/user-authentication/login-methods/email#flutter). The same thing applies for phone accounts, using `privy.sms.linkWithCode` similar to how [`privy.sms.loginWithCode`](/authentication/user-authentication/login-methods/sms-whatsapp#flutter) works.
First, prompt the user for their email address and use the Privy client's `privy.email.sendCode` method to send them a one-time passcode:
```dart theme={"system"}
Future> sendCode(String email)
```
## Link With Code
Then, prompt the user for the code they received and use the `linkWithCode` method:
```dart theme={"system"}
Future> linkWithCode({
required String code,
required String email,
})
```
The one-time passcode sent to the user's email address.
The user's email address.
### Returns
A Result object encapsulating the updated PrivyUser on success, providing immediate access to the user object with the newly linked account.
## Usage
```dart theme={"system"}
// Send code to user's email
final sendResult = await privy.email.sendCode("user@test.com");
sendResult.fold(
onSuccess: (_) {
// OTP was successfully sent, now prompt user for code
},
onFailure: (error) {
print("Error sending OTP: ${error.message}");
},
);
// Link the email using the code
final linkResult = await privy.email.linkWithCode(
code: "123456",
email: "user@test.com",
);
linkResult.fold(
onSuccess: (updatedUser) {
print("Email successfully linked!");
// updatedUser contains the updated user object with the email added
},
onFailure: (error) {
print("Error linking email: ${error.message}");
},
);
```
The steps to implementing the `link` flow are analogous to the [login flows](/authentication/user-authentication/login-methods/wallet#flutter) of both Sign in with Ethereum (SIWE) and Sign in with Solana (SIWS).
To link an Ethereum wallet, use the Privy client's `siwe` handler.
## Generate SIWE message
```dart theme={"system"}
Future> generateMessage(SiweMessageParams params)
```
### Parameters
Set of parameters required to generate the message.
Your app's domain. e.g. "my-domain.com"
Your app's URI. e.g. "[https://my-domain.com](https://my-domain.com)"
EVM Chain ID, e.g. "1" for Ethereum Mainnet
The user's [ERC-55](https://eips.ethereum.org/EIPS/eip-55) compliant wallet address.
### Returns
A result type encapsulating the SIWE message that can be signed by the wallet on success.
### Usage
```dart theme={"system"}
final params = SiweMessageParams(
appDomain: domain,
appUri: uri,
chainId: chainId,
walletAddress: walletAddress,
);
final result = await privy.siwe.generateMessage(params);
result.fold(
onSuccess: (message) {
// request an EIP-191 `personal_sign` signature on the message
},
onFailure: (error) {
// An error can be thrown if the network call to generate the message fails,
// or if invalid metadata was passed in.
},
);
```
## Sign the SIWE message
Using the message returned by `generateMessage`, request an EIP-191 `personal_sign` signature from the user's connected wallet. You should do this using the library your app uses to connect to external wallets (e.g. the MetaMask SDK or WalletConnect). Once the user successfully signs the message, pass the signature into the `link` function.
## Link with SIWE
```dart theme={"system"}
Future> link({
required String message,
required String signature,
required SiweMessageParams params,
WalletLoginMetadata? metadata,
})
```
### Parameters
The message returned from "generateMessage".
The signature of the SIWE message, signed by the user's wallet.
The same SiweMessageParams passed into "generateMessage".
(Optional) you can pass additional metadata that will be stored with the linked wallet.
An enum specifying the type of wallet used to link. e.g. WalletClientType.metamask
A string identifying how wallet was connected. e.g. "wallet\_connect"
### Returns
A Result object encapsulating the updated PrivyUser on success, providing immediate access to the user object with the newly linked wallet.
### Usage
```dart theme={"system"}
final params = SiweMessageParams(
appDomain: domain,
appUri: uri,
chainId: chainId,
walletAddress: walletAddress,
);
// optional metadata
final metadata = WalletLoginMetadata(
walletClientType: walletClient,
connectorType: connectorType,
);
final result = await privy.siwe.link(
message: message,
signature: signature,
params: params,
metadata: metadata,
);
result.fold(
onSuccess: (updatedUser) {
// Link success
// updatedUser contains the updated user object with the wallet added
},
onFailure: (error) {
// Link failure, either due to invalid signature or network error
},
);
```
To link a Solana wallet, use the Privy client's `siws` handler.
## Generate SIWS message
```dart theme={"system"}
Future> generateMessage(SiwsMessageParams params)
```
### Parameters
Set of parameters required to generate the message.
Your app's domain. e.g. "my-domain.com"
Your app's URI. e.g. "[https://my-domain.com](https://my-domain.com)"
The user's Solana wallet address.
### Returns
A result type encapsulating the SIWS message that can be signed by the wallet on success.
### Usage
```dart theme={"system"}
final params = SiwsMessageParams(
appDomain: domain,
appUri: uri,
walletAddress: walletAddress,
);
final result = await privy.siws.generateMessage(params);
result.fold(
onSuccess: (message) {
// request a signature on the message from the Solana wallet
},
onFailure: (error) {
// An error can be thrown if the network call to generate the message fails,
// or if invalid metadata was passed in.
},
);
```
## Sign the SIWS message
Using the message returned by `generateMessage`, request a signature from the user's connected Solana wallet. You should do this using the library your app uses to connect to Solana wallets (e.g. the Phantom SDK or Solana Mobile Wallet Adapter). Once the user successfully signs the message, pass the signature into the `link` function.
## Link with SIWS
```dart theme={"system"}
Future> link({
required String message,
required String signature,
required SiwsMessageParams params,
WalletLoginMetadata? metadata,
})
```
### Parameters
The message returned from "generateMessage".
The signature of the SIWS message, signed by the user's Solana wallet.
The same SiwsMessageParams passed into "generateMessage".
(Optional) you can pass additional metadata that will be stored with the linked wallet.
An enum specifying the type of wallet used to link. e.g. WalletClientType.phantom
A string identifying how wallet was connected. e.g. "wallet\_connect"
### Returns
A Result object encapsulating the updated PrivyUser on success, providing immediate access to the user object with the newly linked wallet.
### Usage
```dart theme={"system"}
final params = SiwsMessageParams(
appDomain: domain,
appUri: uri,
walletAddress: walletAddress,
);
// optional metadata
final metadata = WalletLoginMetadata(
walletClientType: walletClient,
connectorType: connectorType,
);
final result = await privy.siws.link(
message: message,
signature: signature,
params: params,
metadata: metadata,
);
result.fold(
onSuccess: (updatedUser) {
// Link success
// updatedUser contains the updated user object with the wallet added
},
onFailure: (error) {
// Link failure, either due to invalid signature or network error
},
);
```
Use the following method from the `passkey` handler to link a new passkey to a user. Be sure to follow the [Android](/basics/android/advanced/setup-passkeys) and [iOS](/authentication/user-authentication/login-methods/passkey#swift) setup instructions.
```dart theme={"system"}
Future> link({
required String relyingParty,
String? displayName,
})
```
### Parameters
The URL origin where your Digital Asset Links are available (e.g., `https://example.com`).
An optional display name to associate with the passkey. This name will be shown to the user when selecting which passkey to use for authentication.
### Returns
A Result object encapsulating the updated PrivyUser on success, providing immediate access to the user object with the newly linked passkey.
## Usage
```dart theme={"system"}
final relyingParty = "https://yourdomain.com";
final displayName = "Optional Display Name"; // Optional parameter
final result = await privy.passkey.link(
relyingParty: relyingParty,
displayName: displayName,
);
result.fold(
onSuccess: (updatedUser) {
// Successfully linked a passkey to an existing user
// updatedUser contains the updated user object with the passkey added
print("Passkey linked successfully!");
},
onFailure: (error) {
// Handle error
print("Link failed: ${error.message}");
},
);
```
Use the following method from the OAuth handler to link a new OAuth account to an existing user:
```dart theme={"system"}
Future> link({
required OAuthProvider provider,
required String appUrlScheme,
})
```
### Parameters
The OAuth provider to link (e.g., `OAuthProvider.google`, `OAuthProvider.discord`, `OAuthProvider.twitter`, `OAuthProvider.apple`, `OAuthProvider.telegram`).
Custom URL scheme for redirecting back to the app after OAuth authentication.
### Returns
A Result object encapsulating the updated PrivyUser on success, providing immediate access to the user object with the newly linked OAuth account.
## Usage
```dart theme={"system"}
final result = await privy.oAuth.link(
provider: OAuthProvider.google,
appUrlScheme: "your-app-scheme",
);
result.fold(
onSuccess: (user) {
// Successfully linked an OAuth account to an existing user
},
onFailure: (error) {
print("Linking failed: ${error.message}");
},
);
```
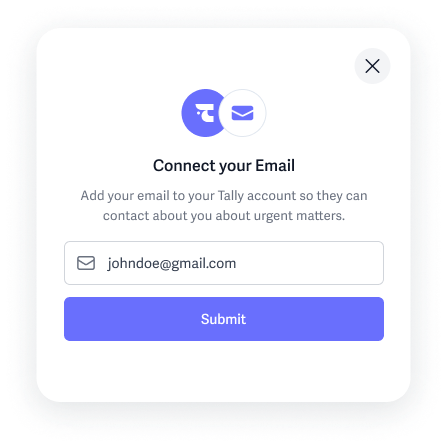 Below is an example button for prompting a user to link an email to their account:
```tsx theme={"system"}
import {useLinkAccount} from '@privy-io/react-auth';
function LinkOptions() {
const {linkEmail, linkGoogle, linkWallet} = useLinkAccount();
return (
Below is an example button for prompting a user to link an email to their account:
```tsx theme={"system"}
import {useLinkAccount} from '@privy-io/react-auth';
function LinkOptions() {
const {linkEmail, linkGoogle, linkWallet} = useLinkAccount();
return (