> ## Documentation Index
> Fetch the complete documentation index at: https://docs.privy.io/llms.txt
> Use this file to discover all available pages before exploring further.
# Configuring your authentication provider
> Configure your JWT-based authentication provider in the Privy Dashboard for custom auth integration
To integrate your authentication provider with Privy:
1. Go to the [**Privy Dashboard**](https://dashboard.privy.io)
2. Select your app from the **App Dropdown** in the left sidebar
3. Request access to **Custom Auth Support** in the [Integrations > Plugins](https://dashboard.privy.io/apps?page=integrations) tab of the Privy dashboard
4. Navigate to the [JWT Dashboard](https://dashboard.privy.io/apps?logins=basics\&page=login-methods) via User management > Authentication > JWT-based auth
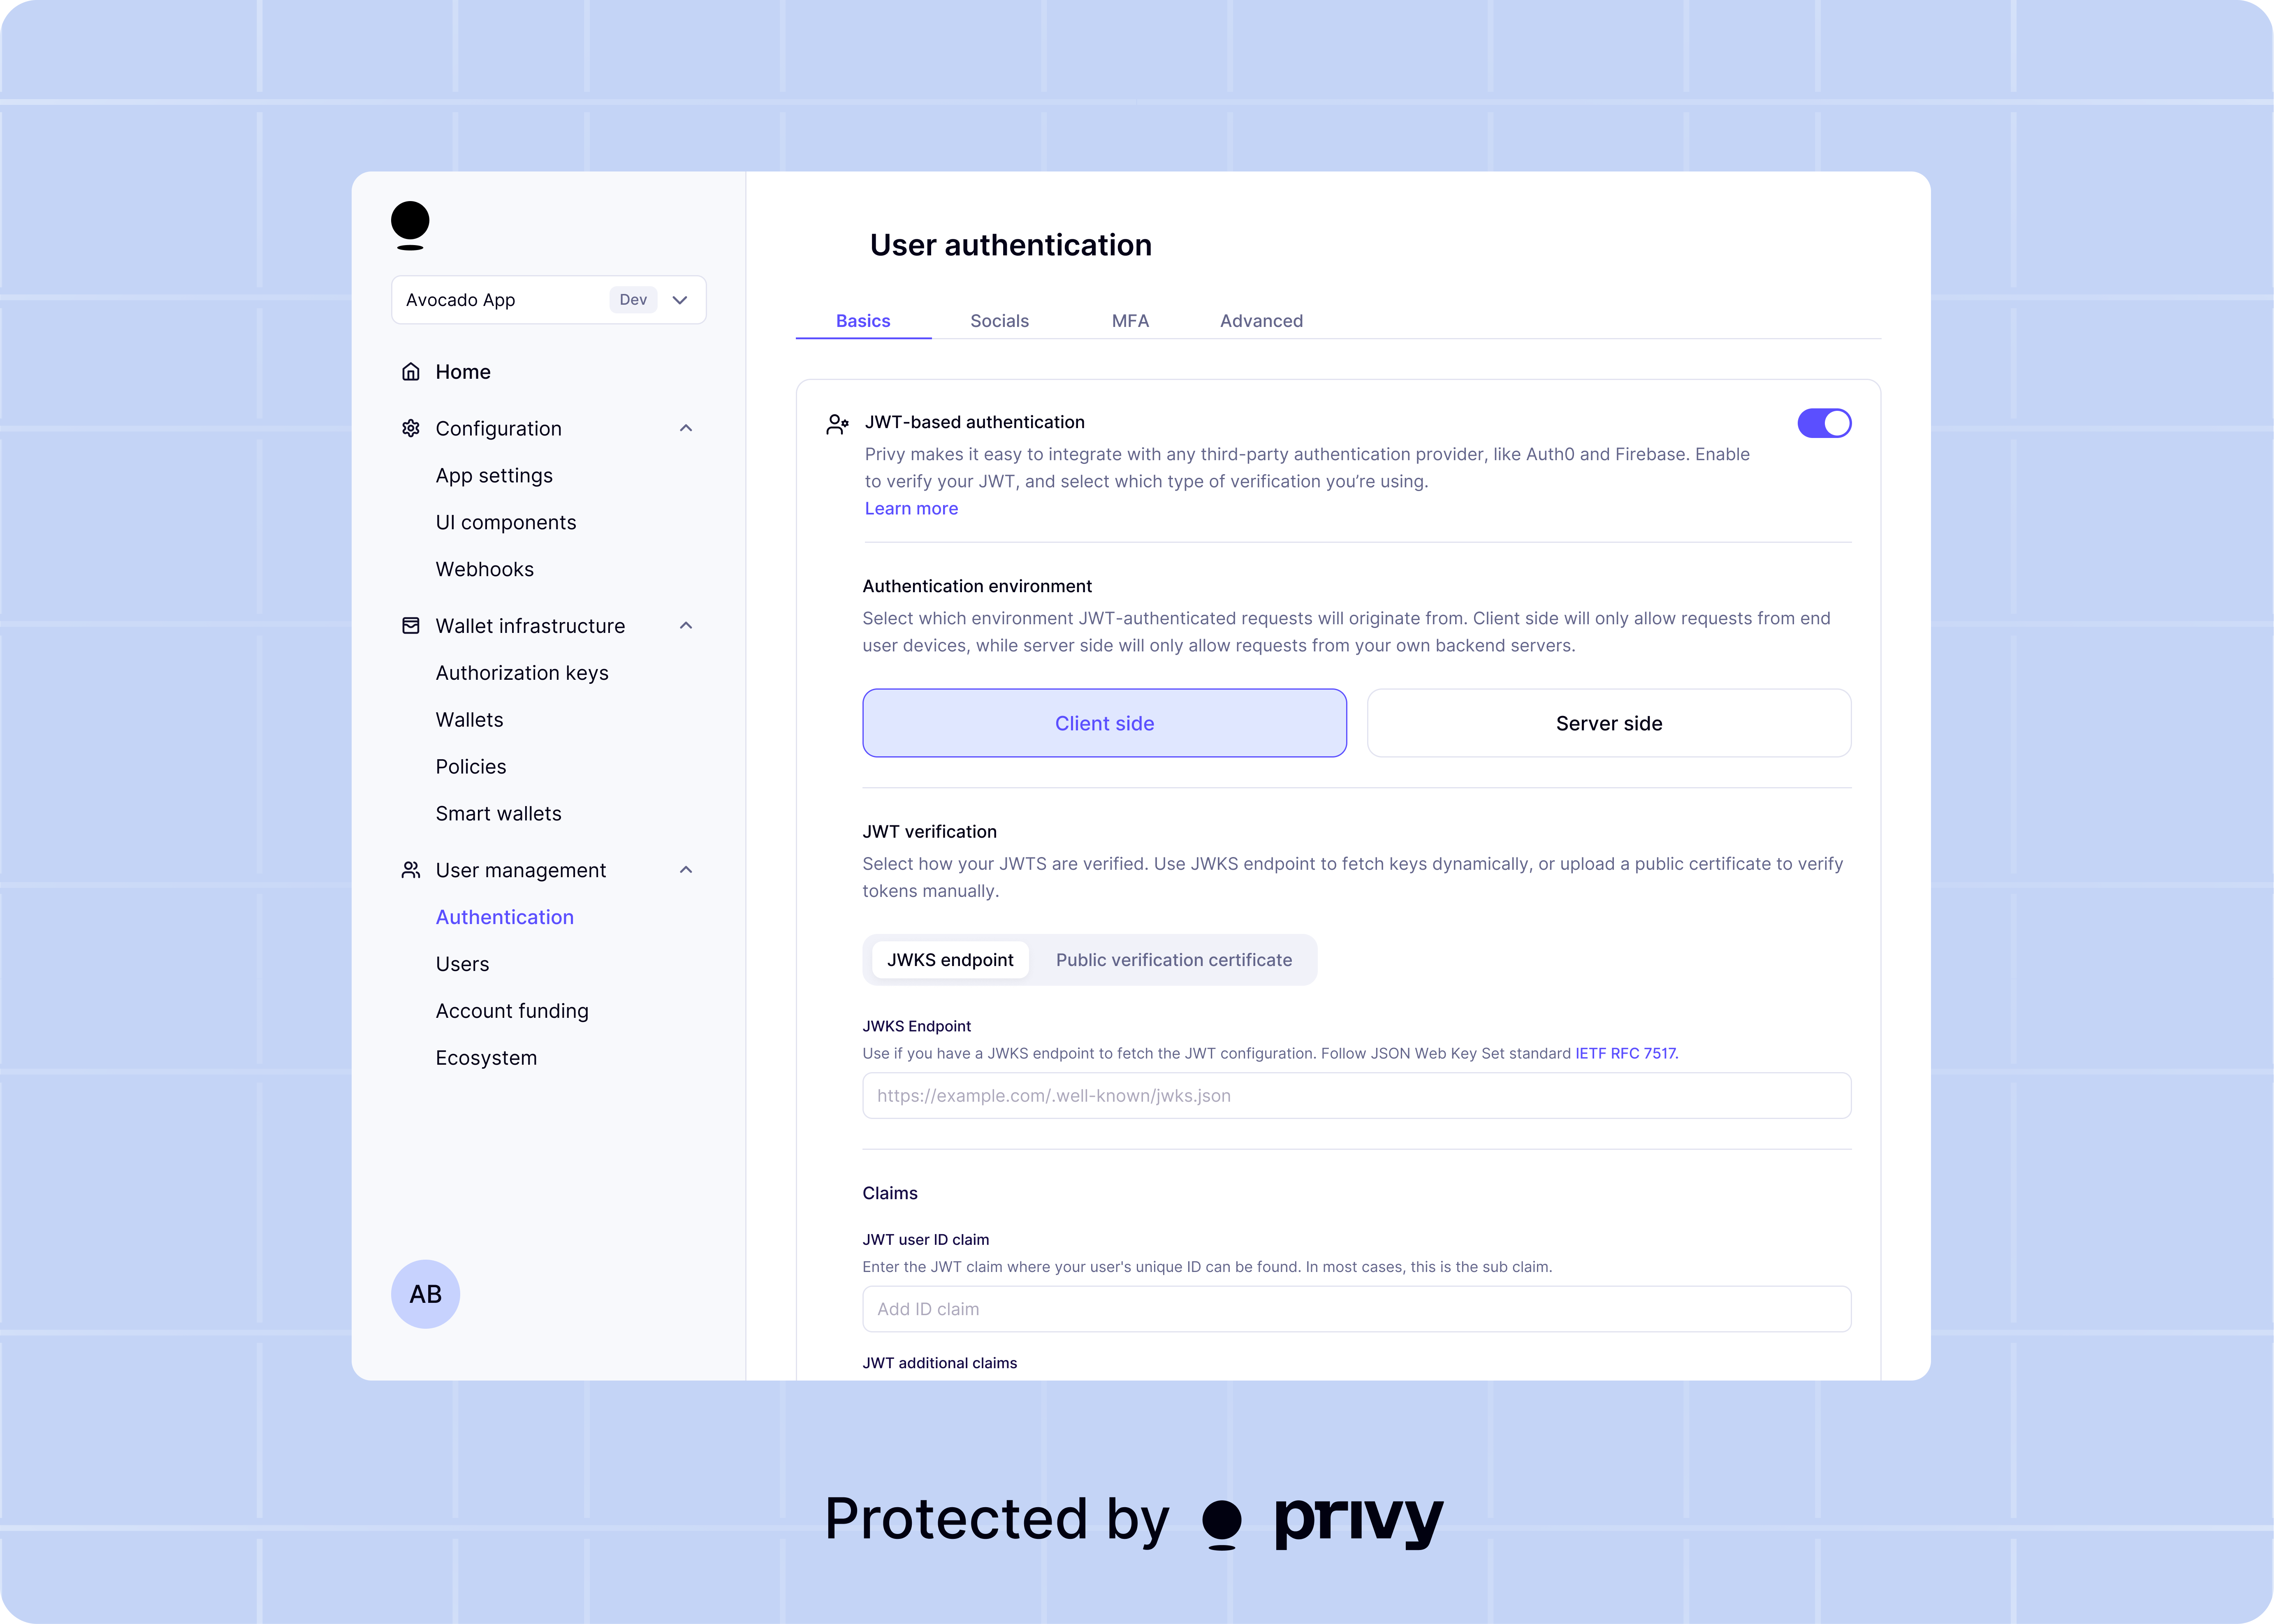 You'll need to provide the following information:
Choose where JWT-authenticated requests can originate from: client-side (end user devices),
server-side (your backend), or both.
**Server-side only is recommended** if your app exclusively authenticates with Privy from your
backend.
Allowing client-side requests means an end user with a valid JWT can call Privy directly,
bypassing any additional checks your server performs before authenticating. For example, if your
server validates subscription status, enforces rate limits, or checks permissions before calling
Privy on behalf of a user, a client-side request with the same JWT would skip all of those
checks.
Only enable client-side if your app uses a Privy client SDK (e.g. `usePrivy` or
`useLoginWithCustomAuth`) to authenticate users directly from the browser or a mobile app. If
your app needs both—for example, client-side SDK authentication and server-side wallet
operations like `/v1/wallets/authenticate`—select both environments.
Privy requires a verification key to ensure the JWTs received are valid. Both the token's signature and its expiration time ([claim](https://datatracker.ietf.org/doc/html/rfc7519#section-4.1.4)) are verified to ensure secure access. This verification process helps protect user data and prevents unauthorized access to Privy services.
You can provide the verification key in one of two ways:
If your provider uses [JWKS](https://auth0.com/docs/secure/tokens/json-web-tokens/json-web-key-sets) to sign JWTs, provide a JWKS endpoint URL where Privy can retrieve your auth provider's JWT public key.
```json theme={"system"}
{
"keys": [
{
"kty": "XXX",
"n": "XXX",
"e": "XXX",
"alg": "XXX", // "RS256" or "ES256"
"kid": "XXX"
// ...
}
]
}
```
If your provider uses a single key to sign JWTs, provide the corresponding public key certificate used for verification.
```json theme={"system"}
-----BEGIN CERTIFICATE-----
// Public key
-----END CERTIFICATE-----
```
Enter the claim from your user's JWT that contains the user's unique ID. In most access tokens and
identity tokens, this is the claim.
You'll need to provide the following information:
Choose where JWT-authenticated requests can originate from: client-side (end user devices),
server-side (your backend), or both.
**Server-side only is recommended** if your app exclusively authenticates with Privy from your
backend.
Allowing client-side requests means an end user with a valid JWT can call Privy directly,
bypassing any additional checks your server performs before authenticating. For example, if your
server validates subscription status, enforces rate limits, or checks permissions before calling
Privy on behalf of a user, a client-side request with the same JWT would skip all of those
checks.
Only enable client-side if your app uses a Privy client SDK (e.g. `usePrivy` or
`useLoginWithCustomAuth`) to authenticate users directly from the browser or a mobile app. If
your app needs both—for example, client-side SDK authentication and server-side wallet
operations like `/v1/wallets/authenticate`—select both environments.
Privy requires a verification key to ensure the JWTs received are valid. Both the token's signature and its expiration time ([claim](https://datatracker.ietf.org/doc/html/rfc7519#section-4.1.4)) are verified to ensure secure access. This verification process helps protect user data and prevents unauthorized access to Privy services.
You can provide the verification key in one of two ways:
If your provider uses [JWKS](https://auth0.com/docs/secure/tokens/json-web-tokens/json-web-key-sets) to sign JWTs, provide a JWKS endpoint URL where Privy can retrieve your auth provider's JWT public key.
```json theme={"system"}
{
"keys": [
{
"kty": "XXX",
"n": "XXX",
"e": "XXX",
"alg": "XXX", // "RS256" or "ES256"
"kid": "XXX"
// ...
}
]
}
```
If your provider uses a single key to sign JWTs, provide the corresponding public key certificate used for verification.
```json theme={"system"}
-----BEGIN CERTIFICATE-----
// Public key
-----END CERTIFICATE-----
```
Enter the claim from your user's JWT that contains the user's unique ID. In most access tokens and
identity tokens, this is the claim.